Friday, October 31, 2014

Making Halloween Costumes without Spending any Money, Part 3

So here is the last Halloween costume for this year. I knew this would be the easiest so I saved it for last. Kaiya asked to be a jellyfish for Halloween this year.  After some internet searching, I found some cute ideas for making a jellyfish costume with an umbrella.  Some of the ideas I saw were quite elaborate and very beautiful. But the one I made is pretty simple. I started with a smaller, purse sized umbrella. This was one that we have had for years stuffed away in the car and when I opened it up, it was kind of breaking anyway. So it's just as well we use it for this costume!


I put a large piece of blue fabric over the top (you guessed it, the last of my curtain fabric!!), but you could just as easily leave it plain. I put a few stitches through the fabric and around the metal wires of the umbrella to hold it in place.


The girls liked it this way and I almost just left the long pieces hanging off the umbrella, but then decided to sew them up to look more like the bell of a jellyfish. 


For this part I just gathered the material and hand sewed through it to create a puffy bottom.  I wasn't sure how it would come out, but I think it turned out looking jellyfish-y enough.


Now for the fun part.  I have had this pink curling ribbon for about 4 years now. I don't remember why I bought such a large spool of it (must have been on sale or something) but it has come in handy A LOT since then. So if you ever see a large spool of curling ribbon and think, when would I use all this?, just buy it. 

So I cut a large piece of curling ribbon and tied it around the the umbrella spoke (is that what it's called? It should be if it isn't).  And then I curled it up.  Repeat about 25 times.  


Here's Kaiya with the finished jellyfish. I may put some more ribbon on for tonight.  She will wear matching top and bottom colors so the focus is on the jellyfish. This is also a good costume for cold weather because she can layer up without covering the costume. It is NOT a good costume for wind, however, which is what we are supposed to have tonight. Crossing my fingers that the weather clears up before Trick or Treat!

Thanks for reading my costume posts! Hope you have a fun and cheap Halloween!

Wednesday, October 29, 2014

Making Halloween Costumes without Spending Money, Part 2

So this is Hanna's costume, which took way more time than I thought it would. Hanna is going to be a starfish this year. At first, I thought I would just use my leftover orange fleece and cut two star shapes and sew them together, leaving openings for the feet and hands, and of course, her head. But the more I thought about the outcome, the more I knew she would not look like a starfish, and instead she would look like an orange blob. She won't keep her arms out and she won't keep a hat on for the top of the star. So I searched a little more and found this idea and thought it was completely adorable. And my version of this starfish is not nearly as well done as hers, but we did what we could without purchasing anything and it turned out alright. So here goes...

I started with a plain white onesie turtleneck and a sparkly white tutu type skirt. We had to go with the turtleneck because it's cold here in Oregon at Halloween time (that's certainly one thing I miss about Death Valley!)  From there I cut a large starfish pattern and a smaller one from the girls' roll of easel paper.  I then cut one big starfish from the orange fleece, hoping the fleece will help to keep her warm on Halloween night. That piece was then hand sewn to the onesie. I wanted to be able to remove it later and keep using the onesie, so I just made some big stitches to hold it on. 

Patrick told me that my starfish were not "pointy enough", so I find it necessary at this time to point out that I was going for cute cartoony type starfish and not anatomically correct ocean creatures. 


Step 2 in the process was to pin and cut the smaller starfish out of regular scrap fabric in orange, green, and blue. I wanted the fronts and backs to be different because you will be able to see the backs when it is finished. 


The next picture is after the fronts and backs are sewn together. I did not cut my corners on the inside, so they are a little puffy, which is what I wanted. I thought it would give the costume some dimension.


One of these starfish will be sewn onto the skirt and the other one onto the big starfish on the onesie. 

Next I went through a lot of trial and error in working on the skirt. I didn't want to cover it completely, and I wanted it to look like seaweed, so eventually I settled on making some seaweed type strips to sew onto it all around. I used some leftover curtain fabric (those curtains are really coming in handy after 5 years!) and sewed it to some green scrap fabric in strips, making the seam look like a wave. Then I turned them right side in and once I had made enough, sewed them around the skirt. I should have tucked the edges under before sewing them down, but didn't, so I needed to make something to go over the top of all the unfinished seams. I decided just to sew some more blue around the waist of the skirt and cover it all up. I worked really hard to pull the elastic and pin it tightly so it would still be stretchy when I was done, but somehow when I pulled the pins it gathered back together and in the end it is not very stretchy at all. She can still get into it at least.


Now, Hanna is in that stage of absolutely hating to get dressed. Or undressed. Or put a jacket on, or socks, or a hat, or anything at all that I try. So she was pretty grouchy about having to put this costume on just so I could take a picture. I got several pictures of her screaming and swinging at me, but no really-cute-happy-to-be-wearing-the-costume-Mommy-spent-3-weeks-on type pictures. Here was the best one, but still not great! The orange on the skirt part is the other starfish. And she really did look adorable in it. Hopefully we will get some better pictures Halloween night!


Thursday, October 09, 2014

Another Sensory Play Project


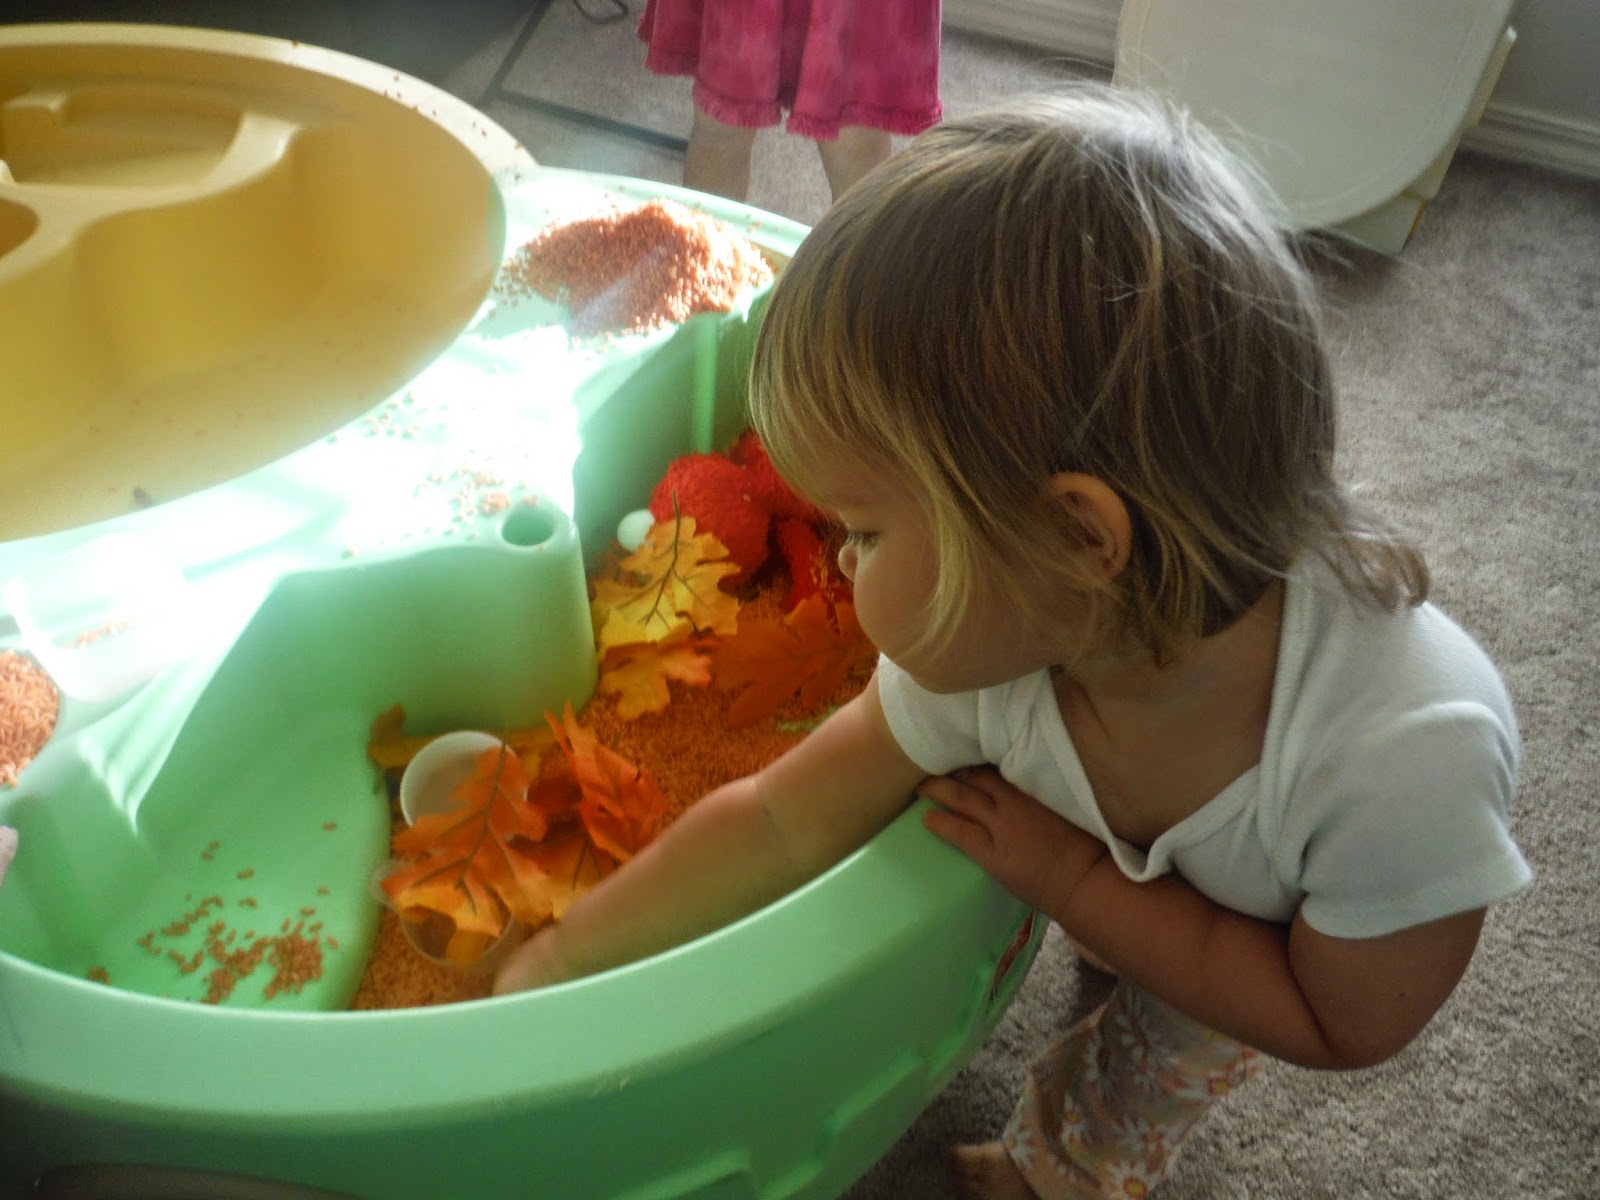
 I have made another sensory bin for Hanna's sensory table. This one is a Fall theme, mostly because I love Fall. We used orange colored rice with cinnamon in it for scent. I used the powdered spice this time, but I think it is best to use extract, if you have it. I did last time and it works much better. The cinnamon I used this time definitely gives it a scent, but every time we play a bunch comes off and is left in the table. It vacuums up easily, but I think after a few more play sessions it won't smell like cinnamon anymore.
I added some fake fall leaves that I had in our Fall decoration bin, some cinnamon sticks, and some scoops for playing.  As you can see, Elmo also managed to make it in at one point. I had wanted to add some small pumpkins and gourds, but have you seen the price of them this year?? At least at Fred Meyer it was outrageous. So they just had to use their imaginations. Which I guess is the whole point anyway, right? This was  a really simple bin but the girls still had a lot of fun with it.

I have more sensory play projects in the works, I just need to find the time to create them! Stay tuned if you are interested!

Tuesday, October 07, 2014

Making Halloween Costumes Without Spending Money, Part 1

This year, I challenged myself to make the girls' Halloween costumes without spending any money on them.  And this could have been really easy, except that they had already decided what they were going to be. So instead of raiding the costume and dress up clothes and putting something together, I have to actually make the costumes that we agreed upon previously. In our family, we like a good Halloween costume theme.  We've done Goldilocks and the three bears, Alice in Wonderland, Japanese kimonos, etc. This year will be no exception. The theme: sea creatures. And while a mermaid is not technically a sea creature since it is not technically real, it still fits the theme. So here is the first in a three part series: How I made a mermaid tail.

This one is Leah's costume, and Leah gets cold easier than anyone else in the family. So I knew I wanted to make her mermaid tail as warm as I could.  Luckily, I had about a yard of orange fleece in my sewing scraps from who knows when and what.  Originally I was just going to use the fleece, but then came upon a package of unopened curtains in this beautiful shade of blue. That's right, curtains.  We have had these curtains in the package for about four years now, and while I have wanted to put them in the girls room forever, for whatever reason we haven't.  So I put them to good use for the costume. 


I had found some really cute ideas online about how to make  a mermaid tail out of really pretty sparkly fabric, but once i committed to not spending anything on it, I had to go it alone. No pattern. The other thing is, I'm not great at sewing. So in figuring out how this would come together I probably ripped out as many stitches as I put in. But eventually, it all worked out. I started out by tracing Leah's lower half onto a roll of newsprint. From there, I cut pieces from both the fleece and the curtain fabric. Then after a lot of trial and error, I got the blue stitched over the orange and left the bottom unfinished so I could attach the tail fin. I also left a bit at the top to fold over to look like that part at the top of a mermaid's tail that folds over (whatever that's called).
The tail fin was challenging, because I wasn't sure how to make it look like a fin and not just extra fabric. I had some leftover elastic thread from another project and decided to try it on this. Elastic thread gathers the fabric together as you sew, resulting in a ruffly look.  I sewed a bunch of straight seams of it down my tail fin pieces and this is what we ended up with. Not really tail fin-ny enough yet.

Next I finished the edges of the tail fins, cutting more off the bottom to get the upside down V shape that I wanted. I then had to sew them into the body of the tail.  After a first attempt I tried it on Leah and realized she couldn't walk because it was too tight at the base.  So I removed those stitches and sewed it open further up the leg on one side so the poor girl will be able to move while Trick or Treating.  I also had left the side of the top open so she can get into it easier, so I attached a ribbon piece on each side for the closure (and since I was spending no money, I couldn't buy matching ribbon... oh well).


At this point, I decided it needed some dressing up, and hot glued some sequins on the front. This was tricky, because the thin blue material let the hot glue seep onto the fleece below, so I had to insert some cardboard between the layers so they wouldn't stick, but also had to keep lifting the blue layer so it would stick to the cardboard. But it worked out in the end.

Here's a picture of the final product.  I wanted it short enough that she wouldn't trip on it when walking, but I wish now that it was a little longer. For the real costume we will be adding some shell necklaces and flowers in her hair.

The whole point of this challenge is not to deprive my kids of really cool Halloween costumes, but to try harder to use what we already have instead of going out and buying something new.  I hope this challenge will help me to get more creative in my use of things and help me to learn to use old things in new ways.

Thanks for reading and stay tuned for Part 2!

Thursday, October 02, 2014

Geology Day and Sensory Bins

 Last Friday we were lucky enough to attend geology day at Lava Beds National Monument. This was supposed to be just for school groups, but since I have somewhat of an in with the supervising ranger there we were able to tag along with one of the public school classes.

This year we are studying Earth science, however, we are several weeks away from the topic of geology.  But I felt the kids would get more out of a geology day if we knew what exactly geology was went over some of my well planned lessons ahead of time.  And since we found out we could go to geology day only 2 days beforehand, we did a last minute crash course in geology the day before.


Here the girls are smooshing moistened graham crackers together to mimic the movement of tectonic plates to make mountains. They thought this was awesome. 


And here they learned more about tectonic plates using jam and graham crackers. I let them cover the crackers with dyed whipped cream (because I was not motivated enough to make frosting), then they put the two graham crackers on top of strawberry jam and pushed them together to mimic magma rising from under the Earth's crust. This one wasn't quite the amazing visual that the mountain graham cracker activity was, but they still liked it and of course asked to eat it at the end. 

We also read some books, looked at rocks from our rock collection and learned the difference between the three types of rocks, studied the rock cycle, looked at pictures of the layers of the earth, and read more books. 


Here are the girls at geology day. We went with some homeschool friends and you can see our four girls off to the side. They had such a great time with all the hands on activities.  I feel like they learned a lot too! And hopefully when we come back to geology in a few weeks they will remember this!


In other news, I've started the addicting process of making sensory bin activities for Hanna! Here she is with her ragamuffin hair (we are in that wild hair stage of toddlerhood) playing in the blue sensory bin. I colored rice blue using vinegar and blue food coloring (I just mixed enough in with the rice to coat it, then laid it out on cookie sheets to dry) and added blue pom poms, blue silicon cupcake liners, blue fake flowers, and any other small blue toys I could find. I am planning to make more of these with other colors to help her learn the colors, plus some seasonal and just for fun using other fillers besides just rice. There are so many amazing sensory bin ideas out there- just a google search away! When I was looking for ideas I also read a lot about how great sensory activities are for toddlers, so I am really excited to have these for her. Plus, it keeps her busy during homeschooling. The only problem is that the older kids would rather play in the rice than do their work!